Photography & Posing
Master Flow Posing Photography: 9 Dynamic Techniques
Introduction Flow posing photography transforms photoshoots from static pose sequences into fluid, dance-like experiences. Your subject transitions continuou...
Introduction
Flow posing photography transforms photoshoots from static pose sequences into fluid, dance-like experiences. Your subject transitions continuously from one pose to another through small, incremental movements—turning, lifting arms, tilting heads—creating dozens of natural-looking images in a short time.
For beginners, flow posing can feel challenging. Directing a constantly moving subject, managing speed, and capturing flattering images requires specific techniques. This guide shares nine expert flow posing methods to help you master this rewarding approach.
What Is Flow Posing Photography?
Flow posing is when your subject continuously transitions between poses with small, deliberate movements. They might start facing the camera, turn to a side-on position, lift arms to hips, fold them across the chest, reach for their hair, and so on—always flowing.
Benefits:
- Speed and efficiency—diverse images in minutes
- Natural-looking results—subjects feel more comfortable
- Diversity—broad range of expressions and positions
Nine Flow Posing Techniques
1. Micro Movements

Micro movements are the foundation of flow posing. Subjects shouldn't make broad or sharp movements—just gentle, gradual transitions.
Tips:
- Remind subjects to keep breathing (they often hold their breath when posing)
- Use gentle encouragement rather than fixed pose commands
- Move around yourself to find flattering angles
- Micro movements include expressions—shifting from a smile to a stoic look can transform an image
2. The Invisible Ball Hand
Many subjects don't know what to do with their hands, forming fists or stiffening fingers. The solution: ask them to pretend they're holding an invisible ball.
This mental image relaxes fingers into natural, gentle curves. Throughout the shoot, ask them to imagine the ball changing size—larger, then smaller—to vary hand shapes and prevent rigid repetition.
3. Touch, Don't Grab
When subjects interact with props, clothing, or their own hair, they tend to grip tightly. Ask them to make light, gentle contact instead—merely resting fingers or brushing across surfaces.
Encourage them not to grab their hair but to brush it behind their ear. Not to grip their dress but to sweep their hand across it. This produces fluid, authentic poses with a calm, relaxed feel.
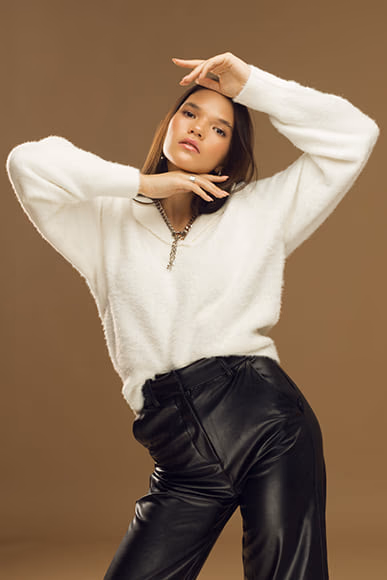
4. Create Air Space
Subjects often keep arms stuck to their sides or legs together, creating stiff, unnatural images. Remind them to create "air space"—pockets of light between limbs and body.
Ask them to lift an arm, put hands on hips, or bend a knee slightly. These small adjustments introduce dynamism and break up the body's form for more interesting compositions.
5. Directional Movement
When subjects move erratically, guide them with directional cues. Ask them to slowly turn left—first their head, then hips, now lift an arm, now touch their face. You're showing them the way while letting them fill in the gaps.
This keeps movements focused and intentional without being overly prescriptive.
6. Clothing Interaction
When subjects run out of movement ideas, use their clothing as a prop. Ask them to brush hands across fabric, lift and release bits of clothing, or roll up sleeves. Frilly, flowing fabrics produce especially good effects.
Focused on this task, subjects often develop natural, harmonious expressions perfect for candid-feeling portraits.
7. Walk and Cross
For larger spaces, have your subject walk a few steps, stop, pivot, and walk back. This creates natural movement and shifts in body position. The crossing action adds dynamic angles as weight transfers from foot to foot.
8. The Head Tilt
A subtle head tilt changes everything—jawline definition, neck elongation, catchlights in the eyes. Vary from slight tilts to more dramatic angles. Combine with expression shifts for dozens of distinct images from essentially the same body position.
9. Breath-Led Movement
Ask subjects to inhale while raising their arms or turning, then exhale while settling into position. This breathing pattern creates organic, wave-like movements. It also helps nervous subjects relax by giving them a familiar rhythm to follow.
Tips for Successful Flow Posing
- Start with 5 minutes of practice movements before serious shooting
- Use continuous shooting mode to capture transitional moments
- Give one direction at a time—too many instructions overwhelm subjects
- Play music to help subjects find their rhythm
- Demonstrate movements yourself for visual learners
- Compliment good moments to build confidence
- Review images together to show subjects what's working
Conclusion
Flow posing produces natural, diverse, and engaging portraits while making subjects feel comfortable and free. By mastering these nine techniques—from micro movements to breath-led posing—you'll create photoshoots that feel less like work and more like a creative collaboration.
The key is gentle guidance. Direct without commanding, suggest without dictating, and let your subjects' natural grace emerge through movement.
FAQ
What's the difference between flow posing and traditional posing? Traditional posing uses fixed, static positions. Flow posing keeps the subject constantly moving through small transitions, creating more natural-looking images and greater variety in less time.
How do I direct nervous subjects in flow posing? Start with simple movements like head tilts. Use breath-led posing to provide familiar rhythm. Demonstrate movements yourself. Compliment good moments to build confidence gradually.
What camera settings work best for flow posing? Use continuous autofocus (AF-C/AI Servo) and burst mode. A shutter speed of at least 1/250 sec prevents motion blur. Apertures of f/2.8-f/5.6 provide subject separation.
Can flow posing work in small spaces? Yes. Focus on micro movements, head tilts, and hand positions. Clothing interaction and facial expression shifts work in any space. Walking sequences need more room.
How long should a flow posing session last? Start with 15-20 minutes of flow posing within a longer shoot. As you and your subject become comfortable, extend to 30-45 minutes for maximum variety.